
Avoid 2am Outages: Rack Cable Management for UK Technicians
21 September 2026
Avoid 2am Outages: Rack Cable Management for UK Technicians
A maintainable rack uses vertical and horizontal managers, hook-and-loop straps, cables labelled at both ends, and service loops with the centre kept clear for airflow. Start there, then inspect for zip ties or blocked exhaust paths, both of which cause more downtime than almost any other cabling fault.
TL;DR:
- Proper rack cable management involves using vertical and horizontal managers, label at both ends, and maintaining airflow pathways to prevent cooling issues.
- Buying managers with spare capacity and following a consistent route entry point are crucial to avoid costly rework and maintain future scalability.
- Sealing gaps with blanking panels and brush strips helps prevent hot exhaust recirculation, which can cause slow temperature increases and equipment failure over time.
- Use Cat6A cables for 10GbE or PoE+ runs, limit bundles to about two dozen cables for PoE++, and always secure with hook-and-loop straps instead of zip ties to prevent damage.
- Follow a step-by-step rework process, including mapping, installing managers before equipment, routing cables carefully, securing bundles properly, and testing before completing the job.
Table of Contents
- What good rack cable management actually achieves
- Essential hardware: managers, brush strips, and PDU placement
- Routing, layout and airflow: the three-zone approach
- Choosing the right cable and bundling it correctly
- Installing or reworking a rack: the step-by-step workflow
- Keeping a rack under control after the install
- Why disciplined cabling pays for itself faster than people expect
- Getting professional installation for your server room
- Standards and field guides referenced
- Sources
- FAQ
What good rack cable management actually achieves
Rack cable management is the discipline of routing, securing, and labelling every cable in cabinet so equipment stays serviceable, cool, and safe to work on. Get it right and three things follow: faster fault-finding, better airflow, and fewer accidental outages caused by someone yanking the wrong patch lead during a change.
The evidence for this is mostly operational rather than statistical, but it’s consistent across every field guide on the subject. A technician who can trace a cable from patch panel to switch port in seconds, rather than minutes, resolves incidents faster. Blocked exhaust paths raise intake temperatures for the equipment above, which shortens component life even when nothing fails outright that day.
Most tangled racks share the same three failure modes:
- Patch cables of random lengths, looped and re-looped until nobody can trace them
- Zip ties cinched tight enough to compress the pairs inside a data cable
- Gear stacked with no blanking panels, letting hot exhaust recirculate back into the intake
None of these happen through neglect exactly. They happen because nobody set the layout rules before the first switch went in.
Essential hardware: managers, brush strips, and PDU placement
You need a specific hardware kit before you plug in a single patch lead, and buying it in the wrong order is the single most common rework cause. RS Components lists the categories every rack should carry: horizontal panels, vertical ducts, cable rings, and brush strips, all sold with airflow and safety as the stated design goals.
- Vertical managers: fit 6 to 8 inches deep on each side, with hinged covers so you can access cables without unscrewing anything. Mount these before any equipment goes into the rack, not after.
- Horizontal managers: a typical sized manager between each patch panel and the switch it feeds is the baseline. High-density rows with many ports usually need the larger size to avoid overfilling.
- Brush strips and entry panels: seal cable cutouts in the top or bottom of the frame so conditioned air doesn’t leak out through gaps designed for cable entry.
- D-rings and cable rings: anchor points inside vertical managers where service loops sit, rather than draping loose across the back of the rack.
- PDU placement: 0U vertical PDUs sit inside the vertical manager zone and free up rack units, while rear-mounted horizontal PDUs are cheaper but eat into cable pathway space. Either way, keep A and B power feeds on physically opposite sides of the cabinet.
Buy managers sized for growth, not just for today’s port count. A rack fitted right at capacity on day one has nowhere to go the first time someone adds a switch.
Routing, layout and airflow: the three-zone approach
Every well-run rack follows the same basic geography: side channels carry cable, horizontal managers separate equipment, and the middle stays empty for air. Practitioner guides call this the three-zone layout, and it’s the single biggest factor in whether a cabinet stays maintainable past its first year, according to CrimpShop’s rack layout guide.
Follow this sequence when planning routes:
- Decide your cable entry point first, top or bottom, and route consistently towards it rather than switching midway through the rack.
- Keep the front-to-back airflow corridor completely clear. Never let a cable bundle cross it, even briefly during a change.
- Run data and fibre through the vertical channels, not across the face of installed equipment.
- Fit blanking panels in every empty rack unit and brush grommets at every entry point, since CrimpShop’s guidance is explicit that unsealed gaps let hot exhaust recirculate straight back into the intake.
- Separate power and data pathways physically, and route A-feed and B-feed power on opposite sides of the frame to preserve dual-feed redundancy if one fails.
Pro Tip: Before closing up a rack after any change, put your hand at the exhaust and the intake in turn. If the exhaust side feels only marginally warmer than the room, air is recirculating somewhere, and a blanking panel is usually the fix.
Airflow problems rarely announce themselves immediately. They show up as a slow creep in intake temperature over months, by which point the cause is buried under six more changes.
Choosing the right cable and bundling it correctly
Cat6A is the sensible default for any run carrying 10GbE or high-power PoE, since it handles the heat generated inside a tightly bundled run noticeably better than Cat6, according to CrimpShop. Cat6 remains fine for shorter runs with no 10GbE requirement, but mixing the two in the same bundle without a plan just creates confusion later.
- Leave enough slack for one service loop per patch cable, stored inside the vertical manager rather than coiled behind the switch.
- Size PoE bundles conservatively: guidance suggests limiting bundles to about two dozen cables for PoE+ and about a dozen for PoE++, since denser bundles trap heat that standard Cat6 struggles to dissipate.
- Use hook-and-loop straps, never zip ties, on any bundle carrying data or fibre.
PoE heat is the reason bundle limits exist. Every cable in a tight bundle acts as insulation for its neighbours, and PoE+ and PoE++ runs push real current down those pairs continuously. Field guides on data centre cabling are blunt about the fix: zip ties can be over-tightened and crush the pairs inside, while hook-and-loop straps like Velcro ONE-WRAP physically cannot be over-tightened and can be reopened for future work without cutting anything.
Installing or reworking a rack: the step-by-step workflow
A rack rework goes wrong when the order gets skipped, not usually when a single component fails. Follow this sequence and most of the common mistakes never happen:
- Preflight: map the rack, decide your labelling convention (a scheme aligned with TIA-606 works well for larger estates), and size pathway capacity with roughly 50% spare room for growth.
- Mount vertical managers first, before any patch panels or switches go in.
- Install patch panels and horizontal managers, spacing a 1U manager between each panel and its switch.
- Route cables before terminating anything, following the route-first, terminate-last principle that field technicians rely on to avoid re-pulling cable later.
- Form service loops inside the vertical manager, never across the airflow corridor.
- Secure bundles with hook-and-loop straps at even intervals, not bunched at one point.
- Test every link before calling the job done, then update the cable map or DCIM record immediately, not at the end of the week.
Skipping step 7 is the most common shortcut, and it’s the one that costs the most later. A cable map that’s a week out of date is functionally useless the first time someone needs it during an outage.
For accessories like structured patch leads and colour-coded straps, a supplier such as Carlacom’s cable range gives a sense of what’s commonly stocked for exactly this kind of build.
Keeping a rack under control after the install
A rack that was tidy on installation day drifts within months unless someone owns an audit cadence. Quarterly checks are a reasonable baseline for most business racks; monthly makes sense for anything changing frequently.
- Check manager fill ratio: anything visibly over 70% full needs attention before the next change, not after.
- Spot-check label integrity at both ends of a sample of cables, since faded or missing labels are usually the first sign documentation has stopped being maintained.
- Log intake and exhaust temperatures each audit to catch airflow drift before it becomes a fault ticket.
Pro Tip: If you find a mislabelled cable, fix the label and the documentation in the same visit. Fixing one without the other guarantees the same confusion returns at the next audit.
Never disconnect a live link to “just check something quickly.” If a re-route is genuinely needed, plan it during a maintenance window and confirm the A/B power split stays intact before you start.

Why disciplined cabling pays for itself faster than people expect
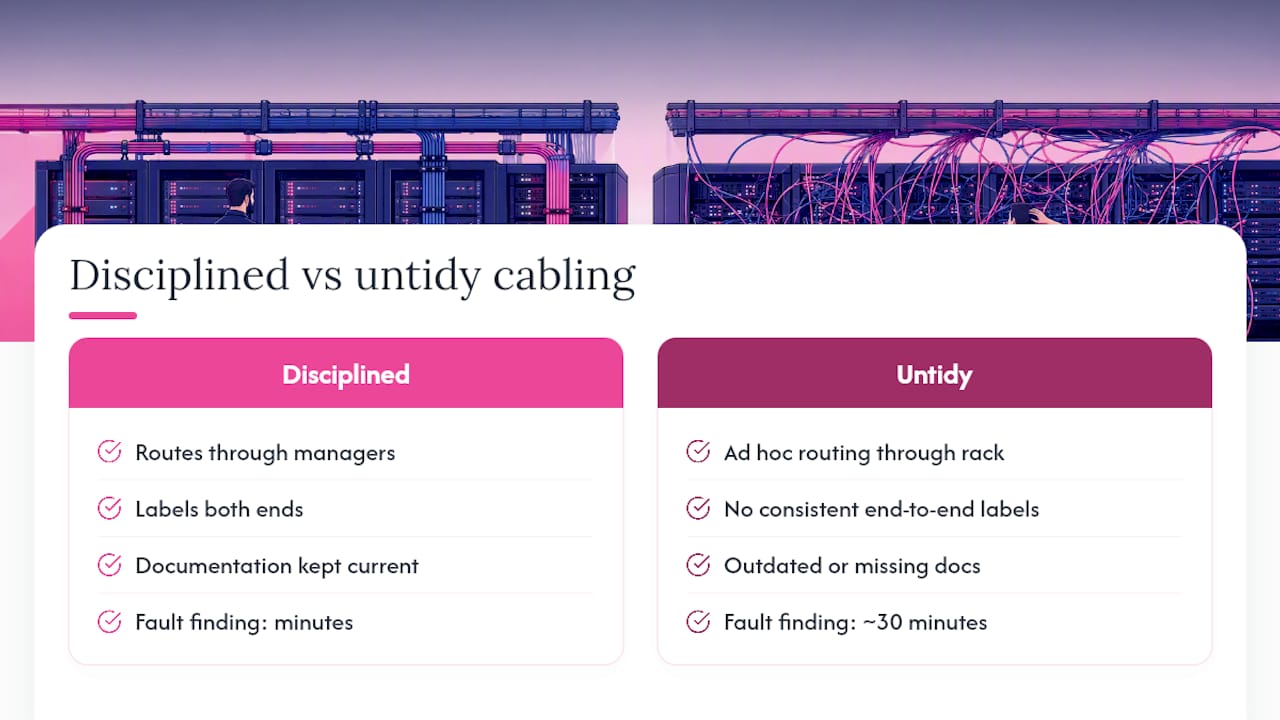
The gap between a rack that looks tidy and one that’s actually maintainable is usually invisible until something breaks at 2am. Teams that route through managers, label both ends, and keep documentation current find faults in minutes rather than the half hour it takes to trace a cable through a tangle by torchlight. That difference compounds every single time someone touches the rack.
Where this connects to wider infrastructure: businesses often treat structured cabling as separate from their broadband, router and connectivity planning, when in practice a rack built without spare capacity or clear pathways makes every future upgrade slower and more expensive to install.
— Paul
Getting professional installation for your server room
Reading a routing guide is one thing. Fitting managers, running new drops, and re-terminating a rack full of legacy cabling on a live site is another, and it’s where most in-house attempts run out of time. Structured cabling installation services for businesses often include UK-based support if something needs attention after the job’s done.

The service covers the full job: planning pathway capacity properly, fitting vertical and horizontal managers before equipment goes in, dressing and labelling every run, and working around a live office so disruption stays minimal. If your rack has grown organically over several years and nobody’s confident tracing a single cable through it any more, that’s exactly the scenario a proper rework fixes. Get in touch through Network Cabling Installation to arrange a site survey and a quote for bringing your cabinet up to standard.
Standards and field guides referenced
- TIA-606: the cable administration and labelling standard referenced throughout the installation checklist.
- TIA-942 and TIA-568: data centre infrastructure and copper performance standards underpinning cable selection guidance.
- CrimpShop’s rack layout guide and Anvilfield’s field guide: practical technician-level references for routing and bundling rules.
- RS Components: hardware categories available to UK buyers.
Sources
- Rack cable management — RS Components
- Data center rack cable management field guide — Anvilfield
- Cable management for server racks: a pro’s layout guide — CrimpShop
FAQ
How do I organise cables in a rack?
Fit vertical managers on each side before installing equipment, add a 1U horizontal manager between each patch panel and switch, then route through the side channels while keeping the centre clear for airflow. Label every cable at both ends and secure bundles with hook-and-loop straps rather than zip ties, following the route-first, terminate-last sequence.
What makes a good vertical cable manager for server racks?
A good vertical manager is 6 to 8 inches deep with a hinged cover for access, and sized with spare capacity so it doesn’t overfill as the rack grows. It should also provide anchor points, such as D-rings, for storing service loops safely away from the airflow path.
What is the best cable management system?
There’s no single best system; the strongest setups combine vertical managers, 1U horizontal managers between panels and switches, brush strips at cable entry points, and hook-and-loop straps throughout. Practitioner layout guides converge on this three-zone combination because it balances access, capacity, and airflow together.
What are the different types of rack cable management accessories?
The main categories are vertical ducts, horizontal panels, cable rings, and brush strips or entry panels, as listed by RS Components among suppliers serving UK data centres and comms rooms. PDUs, whether 0U vertical or rear-mounted horizontal, also factor into the layout since they compete with cabling for the same rack space.
Should I use zip ties or Velcro straps for rack cables?
Use hook-and-loop straps, never zip ties, on any bundle carrying data or fibre. Field guidance is explicit that zip ties can be over-tightened and damage the conductors or fibre cores inside, while straps like Velcro ONE-WRAP can’t be over-tightened and can be reopened for future changes.